Submitted by Fred Straker on
Since PANO mode on the iOS camera first appeared on iPhone 5, Apple has continued to refine the process of panoramic image capture. While the photos are now up to 63 megapixels, the basic process of recording a panoramic photo has remained the same. Here are several handy tips for taking good iPhone panoramas, starting with how to switch the PANO arrow direction when recording.
Switch the arrow direction
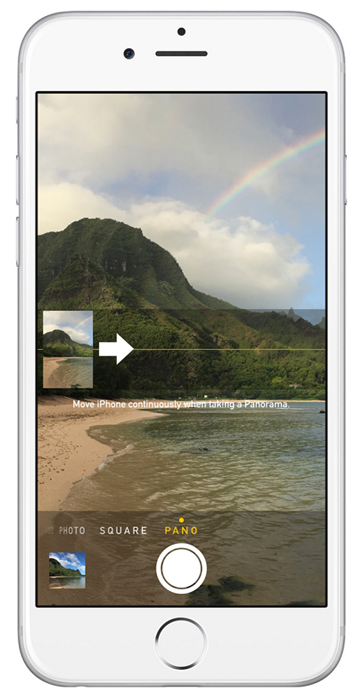
By default, PANO mode captures images while the iPhone is moving left to right. To reverse the capture direction:
1. Open the Camera app and switch to PANO mode
2. Tap the white arrow, it will flip around
3. Proceed to record the panorama
For the best panoramas
1. Ensure there is adequate lighting in the scene2. Follow the directions that appear in the viewfinder while recording
3. Maintain steady movement and keep the arrow centered on the line
Once the panorama is complete
Panoramic photos taken on the iPhone can be shared just like any other picture on the camera roll. The maximum field of view in one panorama is 240 degrees. The resulting images are up to 43 megapixels on the iPhone 4s and later, with iPhone 6s and 6s Plus panoramas clocking up to 63 megapixels. Don't forget that storing many panoramas on the camera roll or in albums on the Photos app can take up a significant amount of storage.
Go vertical
Newest iPhone FAQs
The iPhone will recognize when it's turned sideways, even in PANO mode. This means interesting photos can be taken by capturing a panorama from top to bottom, or bottom to top. The resulting image will be a vertical panorama, and the photo will be turned 90 degrees from horizontal. To take vertical panoramas simply hold the iPhone in landscape orientation (with the home button on the left or right side of the screen) while in PANO mode.
