Submitted by Jon Reed on
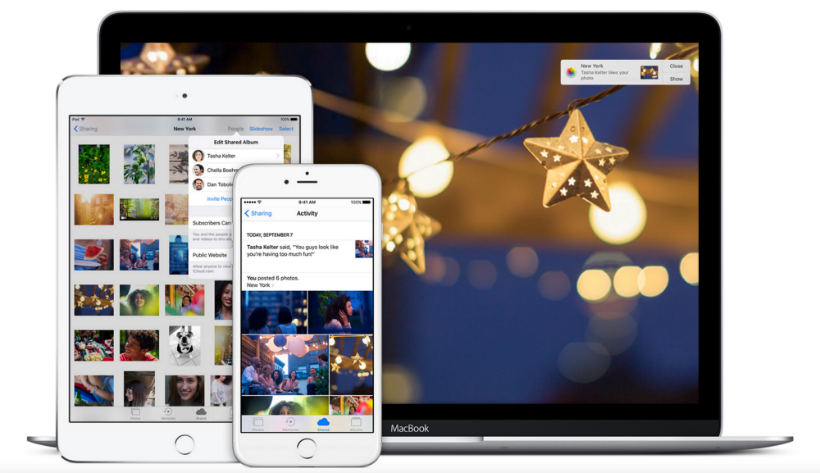
Sharing photos with friends and family is arguably the main reason people take photos in the first place. There are countless methods of sharing photos - you could share a folder of photos on Dropbox, upload to Facebook or Flickr, add to your story on Instagram, and the list goes on. Each has its own take on photo sharing and some may suit you better than others, but if you have an iPhone or iPad, iCloud Photo Sharing is an excellent option.
iCloud Photo Sharing allows you to create and share an album of photos with specific people, so for instance, if you go on a trip with friends, you can create an album of your photos from the trip and share it with everybody else who went with you. What's more, the service allows them to add their photos to the album as well, and everybody can comment on the photos. Here's how to set up and use iCloud Photo Sharing:
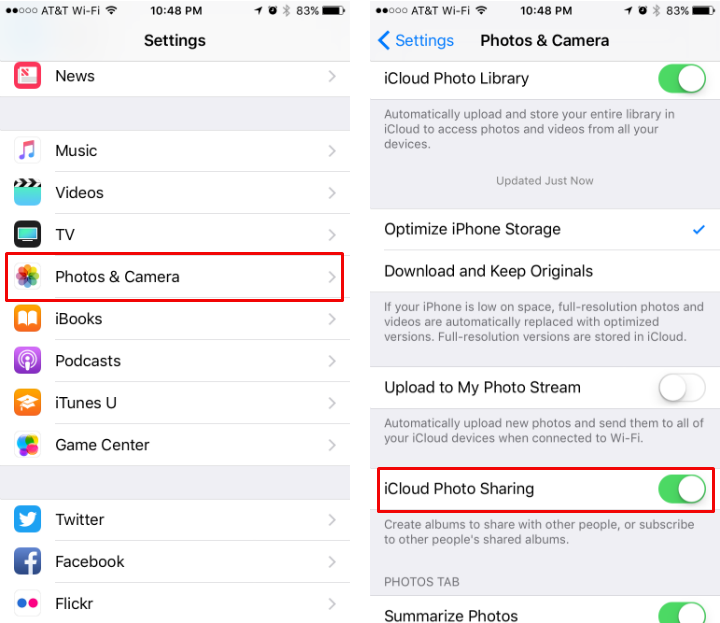
- In order to share albums with others (and let others share with you) you'll need to turn on iCloud Photo Sharing. Head to Settings -> Photos & Camera and toggle on iCloud Photo Sharing.
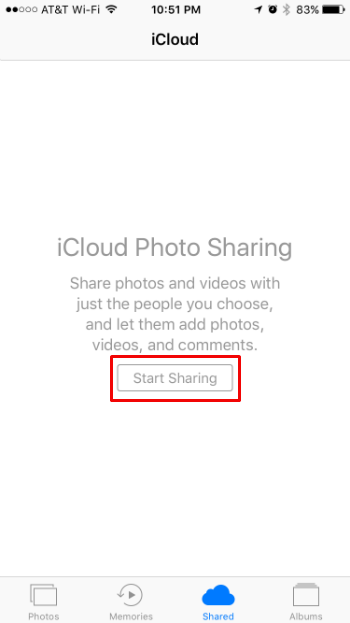
- Now you will see a "Shared" tab when you open your Photos app. To create a shared album, tap "Start Sharing" if this is the first time you've used the service, otherwise tap the "+" in the top left.
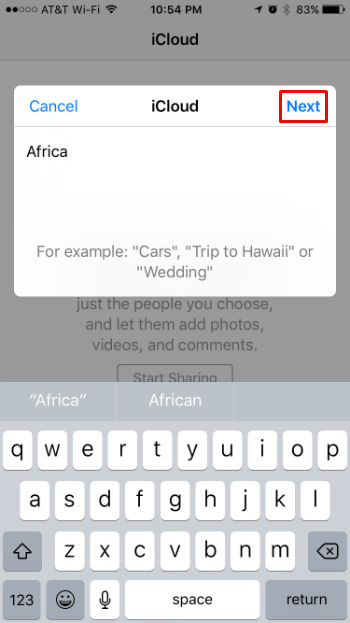
- You will now be prompted to enter a title for your shared album. After doing so, tap Next.
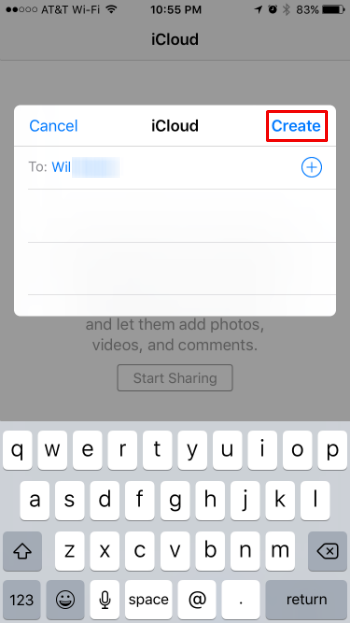
- Now you enter your contacts that you want to share with. Add as many as you want, then tap Create. You can always invite more people later.
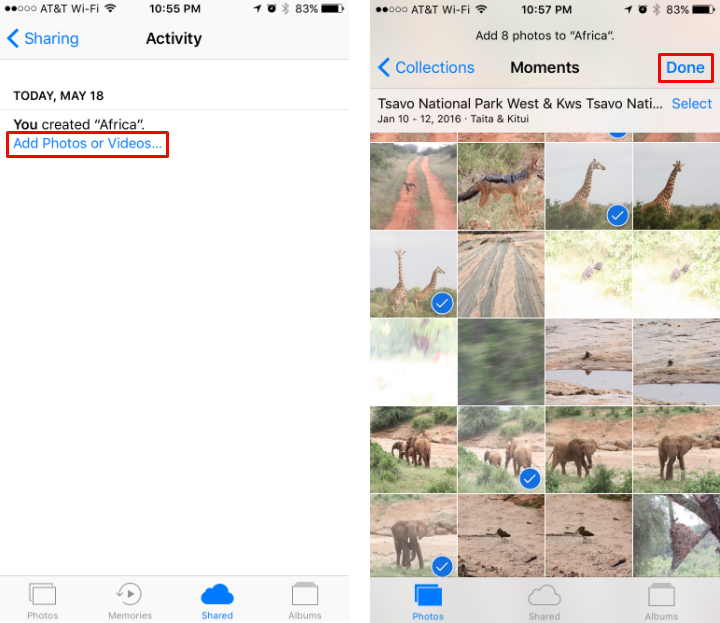
- Add photos to your new album by tapping "Add Photos or Videos" then selecting the photos you want to share. Tap Done when finished.
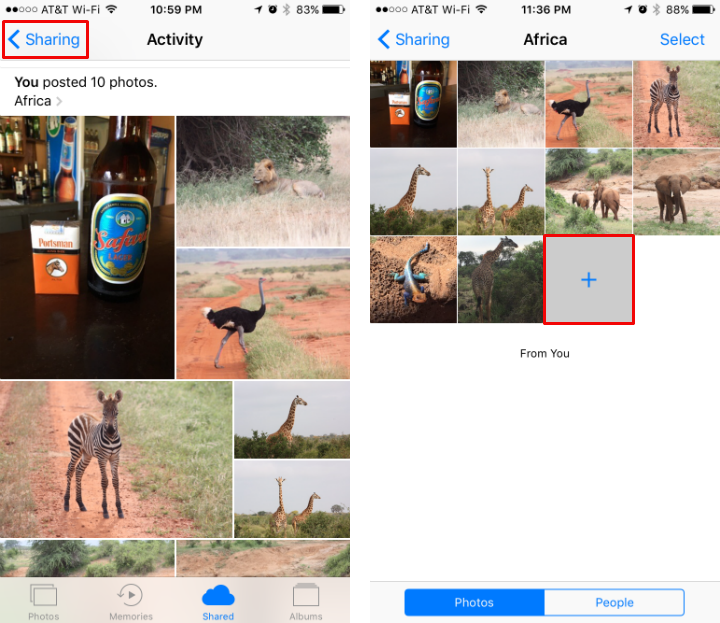
- Your album has now been created and shared. You will be in the "Activity" window at this point, so tap on Sharing in the top left, then tap on your newly created album to go into it. You can add more photos by tapping the "+" tile.
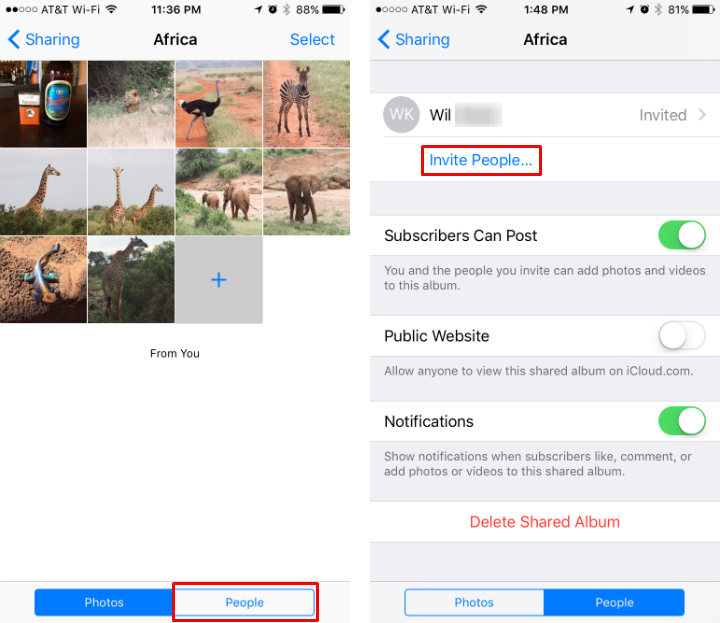
- To share the album with more people, tap on the People tab at the bottom, then tapping "Invite People." Keep in mind that anybody you share with will also have to enable iCloud Photo Sharing in order to receive the invite.
- Just like other social media and photo sharing apps, you can comment on photos and "like" them. To do so, simply tap on a photo and then tap either "Add a comment" or "Like."
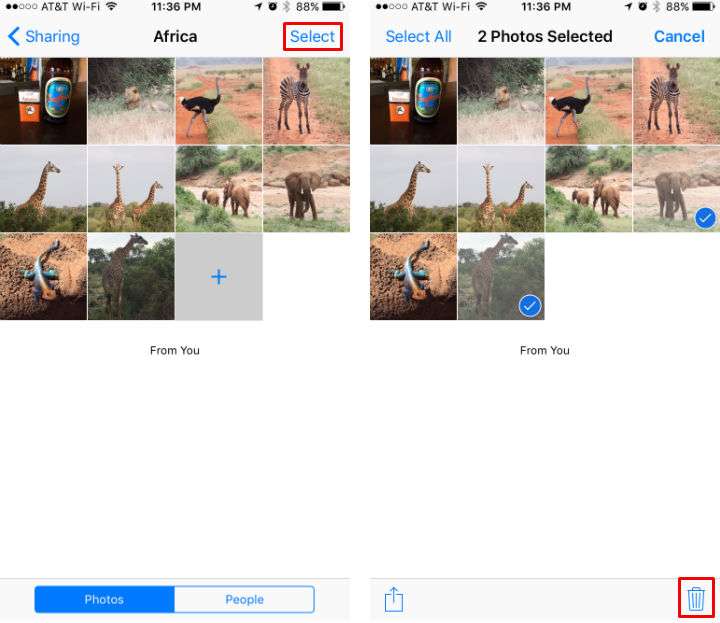
- To delete photos from the album, tap "Select" in the top right, select the photos you want to delete then tap the trash can icon the bottom right.

That's all there is to sharing your photos via iCloud. The only drawback to iCloud Photo Sharing is that the people you want to share with must have iCloud accounts and have iCloud Photo Sharing enabled.
