Submitted by Bob Bhatnagar on
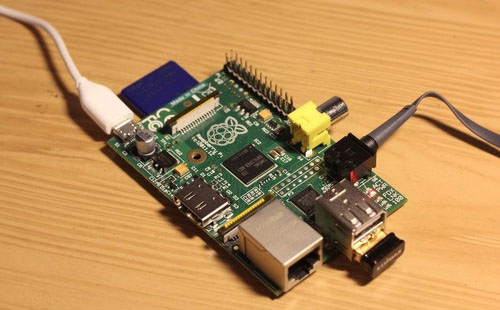
Now anyone with an extra $48 and some computer skills can make their old stereo into a Wi-Fi AirPlay receiver. Normally you would drop $100 or more on a device (like the Apple TV) that can stream audio from your iPhone, iPad or iPod touch. Using the Raspberry Pi miniature computer, engineering student Jordan Burgess has saved himself over $50 and illustrated exactly how to create your own AirPlay receiver.

The finished product uses Shairport open source software, gets its power from a microUSB cable, and connects to the stereo using a mini 3.5mm audio cable. Selecting to output sound from your iPhone to the stereo is as simple as selecting AirPi as the output from the AirPlay menu in whatever iOS app you're using to play the music.
The process, which is detailed on Jordan's blog, requires a few parts to get started:
Raspberry Pi model B
SD card (2 GB)
USB Wi-Fi adapter (Edimax EW-7811UN recommended)
MicroUSB cable for power
An ethernet cable, or keyboard and monitor for initial setup
Regardless, this proof of concept makes it clear that AirPlay can be retrofitted onto a variety of devices using the inexpensive and completely customizable Raspberry Pi miniature computer. Apple fans who enjoy DIY projects take note!