Submitted by Fred Straker on
The stock iPhone Photos app has many built-in editing features. These make it possible to change and customize images right in iOS 7 before sharing or downloading the photos to a computer. One basic function is cropping, which can improve photos by recomposing what's visible in the frame.

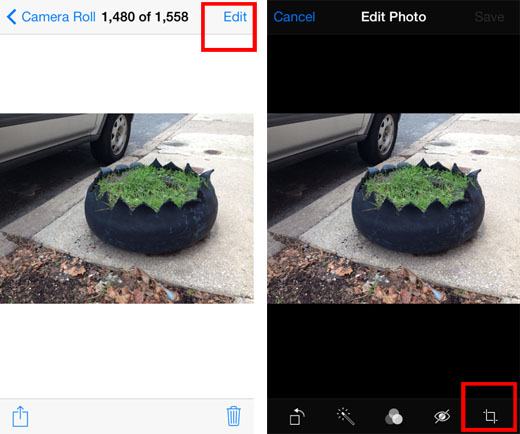
To begin cropping an image from either the iPhone camera roll or an album, start by opening the Photos app and viewing the image you wish to crop. Tap Edit in the upper right corner to get started. Next touch the square crop icon in the lower right corner to enter photo crop mode. From here, there are two options to shave off parts of a photo.

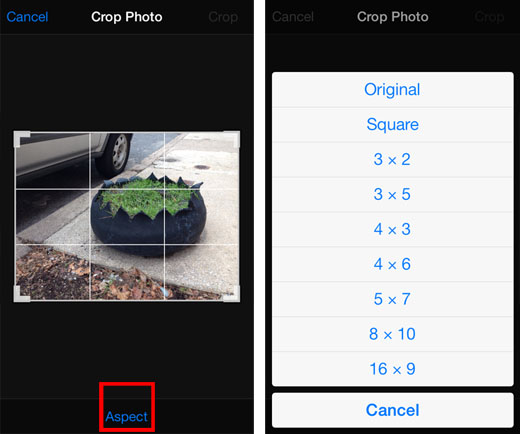
Pressing the word Aspect at the bottom center of the display will yield a pop-up menu of several preset options. These sizes will be applied regardless of the composition, resulting in the aspect ratio listed on the menu. Choosing an aspect, such as Square, will result in the crop selector being automatically sized. This crop selector appears as a gridded box.
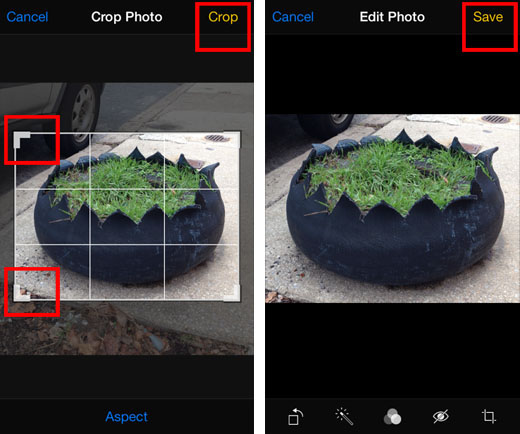
If you like the aspect, tap Crop to preview the change. If the photo is cropped properly touch Save to save this modified image to your camera roll.
Another option makes it possible to manually crop an image to the desired size. Instead of choosing a preset aspect, simply touch, hold and drag any corner of the crop selector to resize. When finished, tap Crop to preview the change. Touch Save and this new image will be saved to the camera roll. Don't worry, the original image is not altered.
Newest iPhone FAQs
Cropping an image with iOS 7 can quickly fix a bad composition or fit an image to the correct aspect ratio for printing or sharing online.