Submitted by Jon Reed on
Anybody who travels internationally knows that going through customs upon re-entry to the U.S. can take a while, which can be really unpleasant when you just want to get home after a long flight. It can be a downright nightmare if you need to catch a connection. The process continuously improves though, as technological innovations are applied to expedite it wherever possible. As mobile boarding passes have helped speed up check-in in recent years, U.S. Customs and Border Protection has looked to mobile technology to make re-entry more efficient. This led to the development of the Mobile Passport app.
As the only app of its type approved by the U.S. Department of Homeland Security, Mobile Passport lets you create a profile that can be re-used for future trips and submit answers to questions about the particular trip you are returning from, all before you even get to the actual customs agent. You receive a receipt in the form of a QR code that the agent will scan and then, assuming there are no issues, you are on your way. The app is available to U.S. and Canadian citizens and is available for free for both iOS and Android. Here's how to set it up on your iPhone:
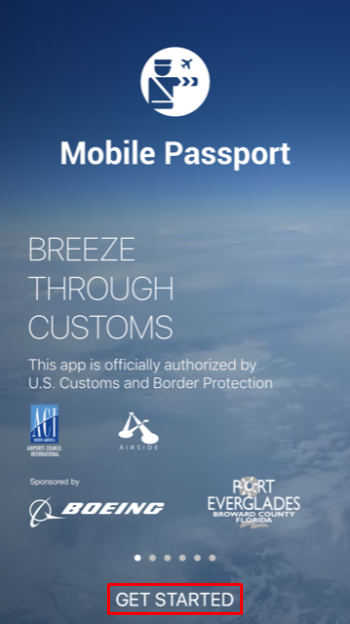
- After downloading Mobile Passport from the App Store for free, open it up and tap "Get Started" at the bottom.
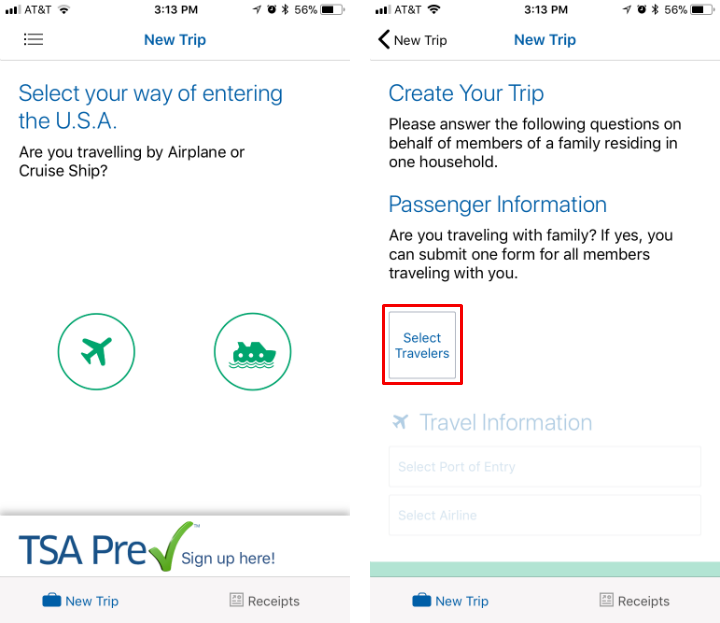
- Select your way of entering the U.S., either by plane or boat. Tap one even if you aren't currently on a trip, as you will be able to enter your passport info in the next step. After choosing, tap "Select Travelers" to add your passport info.
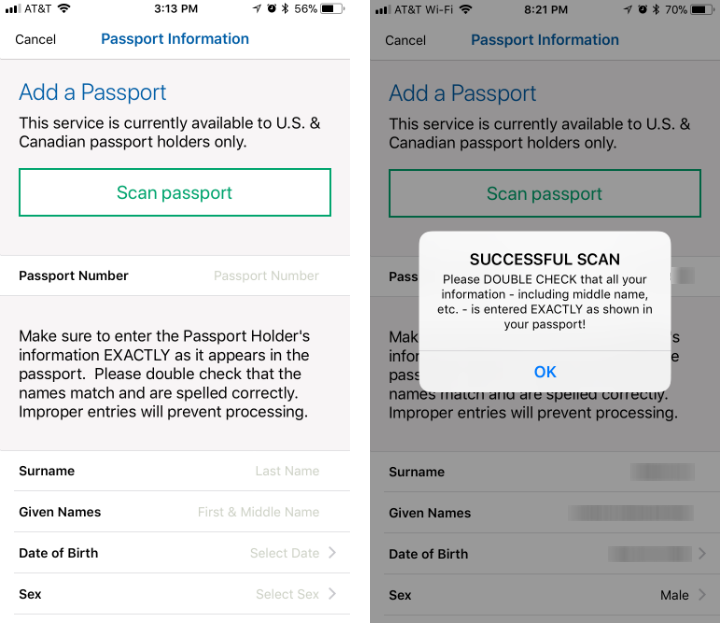
- Now you can either manually enter your passport information or you can scan it in. The scanner works well once you capture the right part of your passport, but it's a bit difficult focusing it at first. It is looking for the two alphanumeric rows below your picture in the passport. Once you've scanned your info in, you will be prompted to double check it. Tap OK, make sure your info is correct, then tap "Save" in the top right corner.
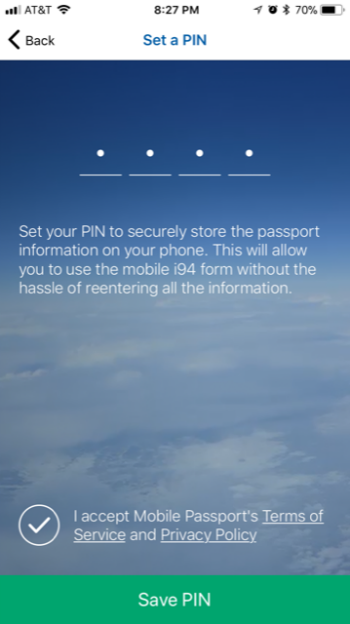
- Once you save your passport data you will be prompted to create a pin that will be required to open the app from this point on. You can also choose to let Touch ID open it.
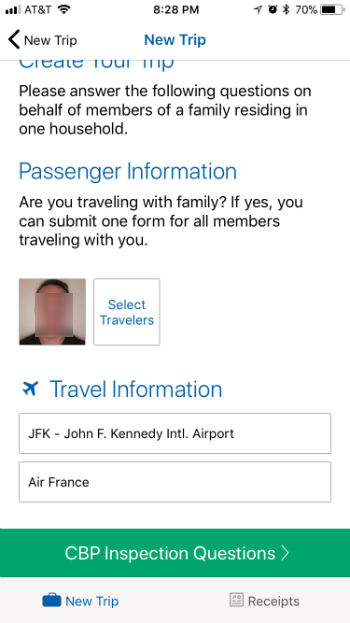
- Now add your photo by tapping on the square with a camera icon in it (the same square with the photo in it in the image below). When you are satisfied with your photo, tap Save. Everything up to this point is saved for future use, the rest is entered when you are actually traveling. So when returning from your next trip abroad, open up the app, tap "Select Travelers" and choose your passport then tap "Done" in the top right. Now you can enter your Travel Information. Tap the box that says "Select port of entry" to open a list of available air or sea ports. Choose one then move on to "Select Airline" (or cruise line). When finished, tap on "CBP Inspection Questions" at the bottom.
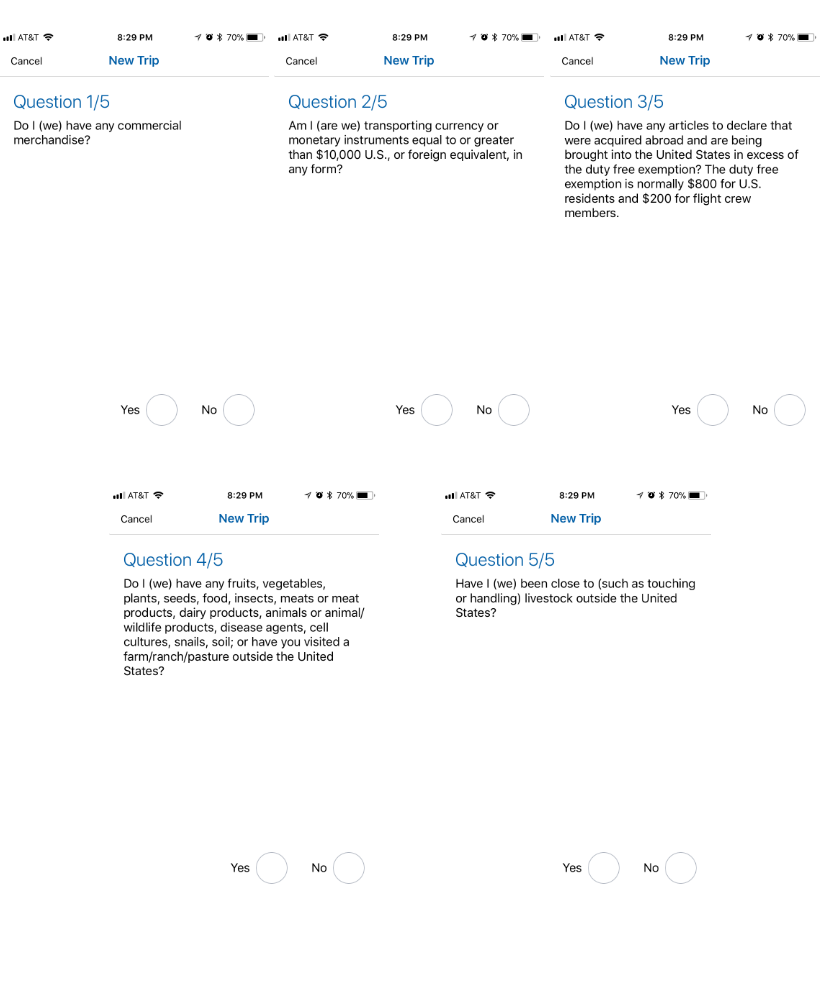
- Now you answer five questions, the same ones you normally would answer on forms handed out on the plane by flight attendants. No more fretting that you forgot to bring a pen.
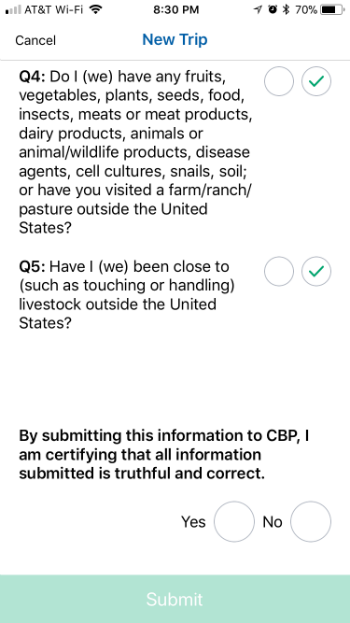
- Review your answers when you are finished and verify that you are telling the truth, then when you have Wi-Fi, tap the Submit button. You should quickly receive a QR code "receipt" that the customs agent can scan when you get there. Look for the designated Mobile Passport aisle when you get to customs.
Assuming none of your answers prompt further questions and you aren't marked for a random inspection, this should significantly speed up your passage through U.S. customs. You can also add the rest of your immediate family to the app simply by selecting "Add new Passport" after tapping "Select Travelers" when you first open the app.
