Submitted by Jon Reed on
Turning on subtitles in your various media sources like Netflix, Hulu, HBO, etc. is usually easy enough, often just requiring you to tap the "CC" button or open up the app's settings. If, however, you use subtitles all the time, you can permanently turn them on in iOS settings. Once they are on, they will show up on everything you watch through the TV app. What's more, you can choose from several caption styles and even customize your own. Here's how to do it on iPhone and iPad:
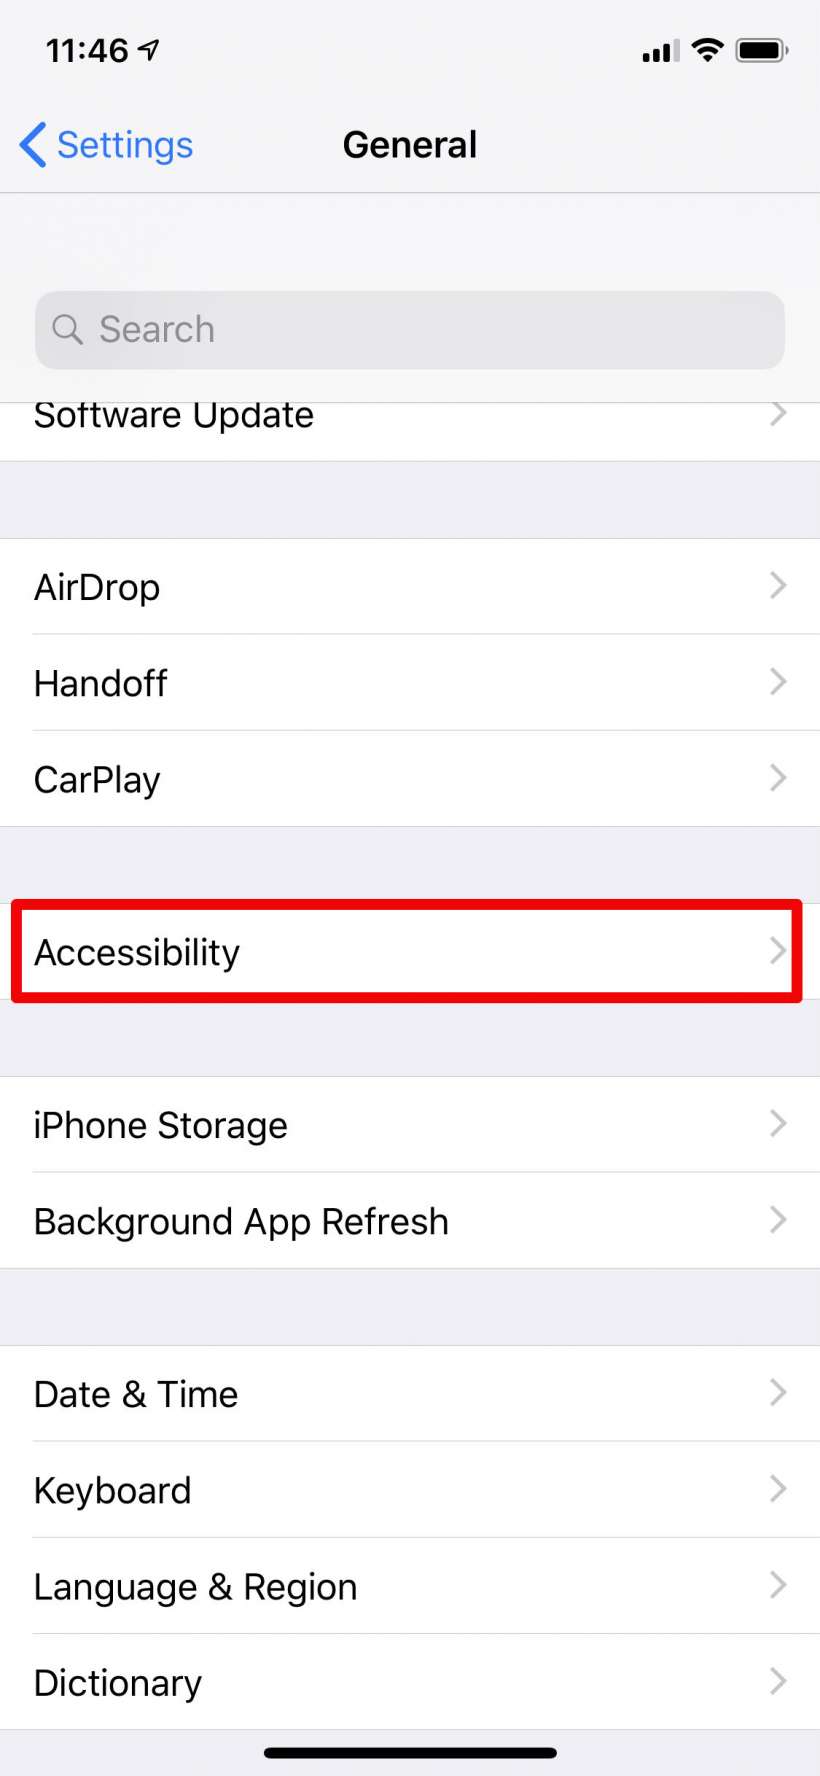
- Open up Settings -> General -> Accessibility on your iPhone or iPad.
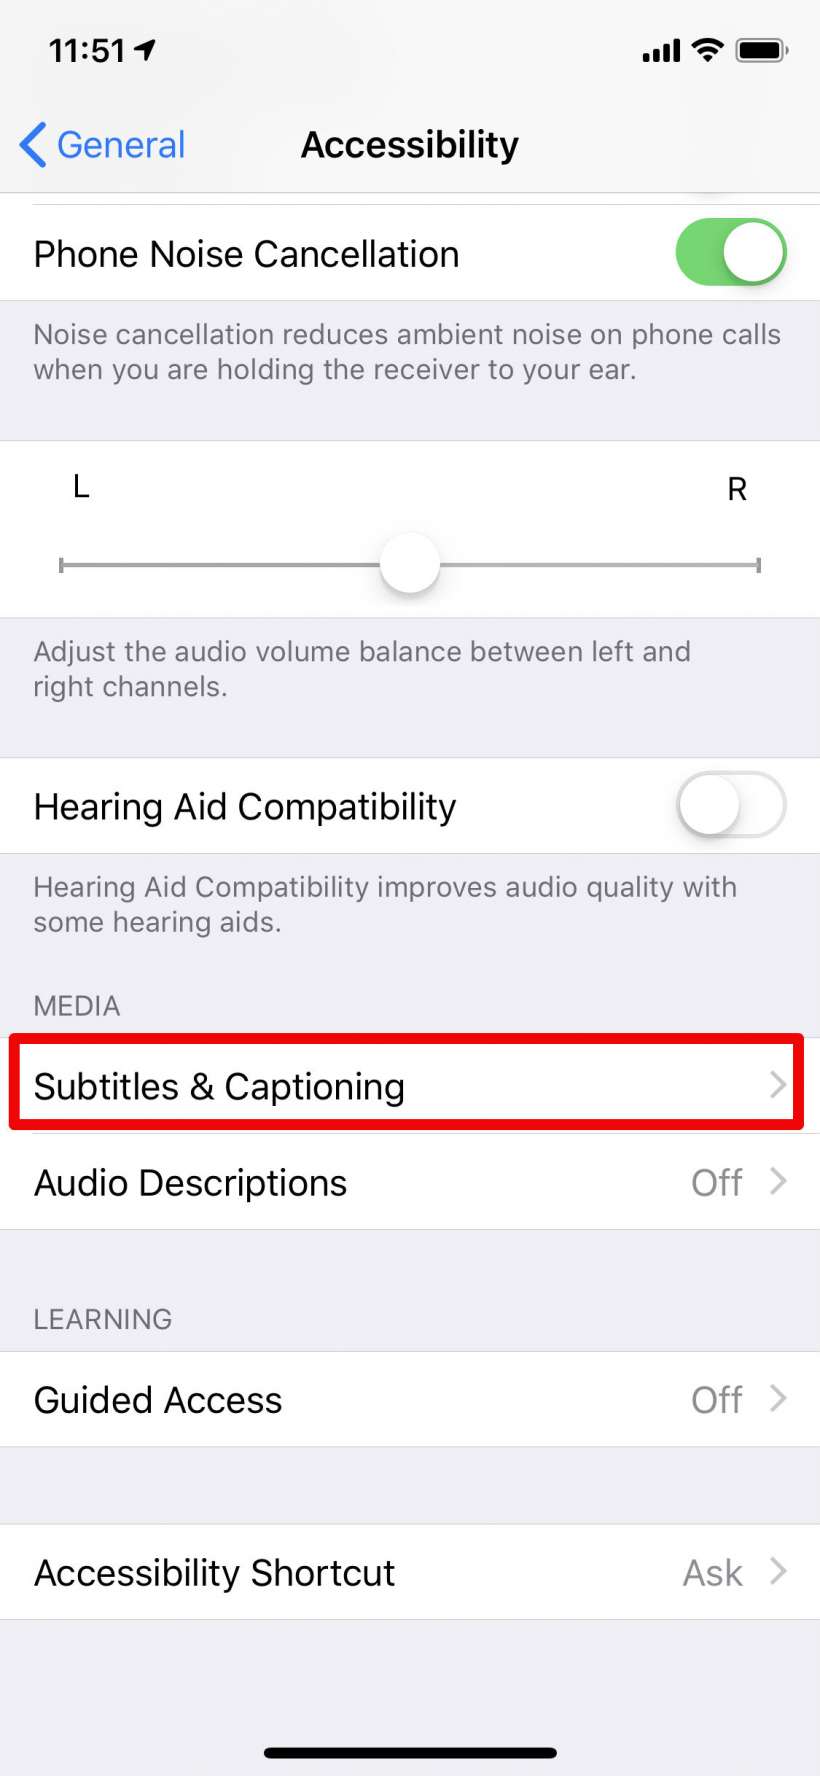
- Scroll all the way down and go to Subtitles & Captioning.
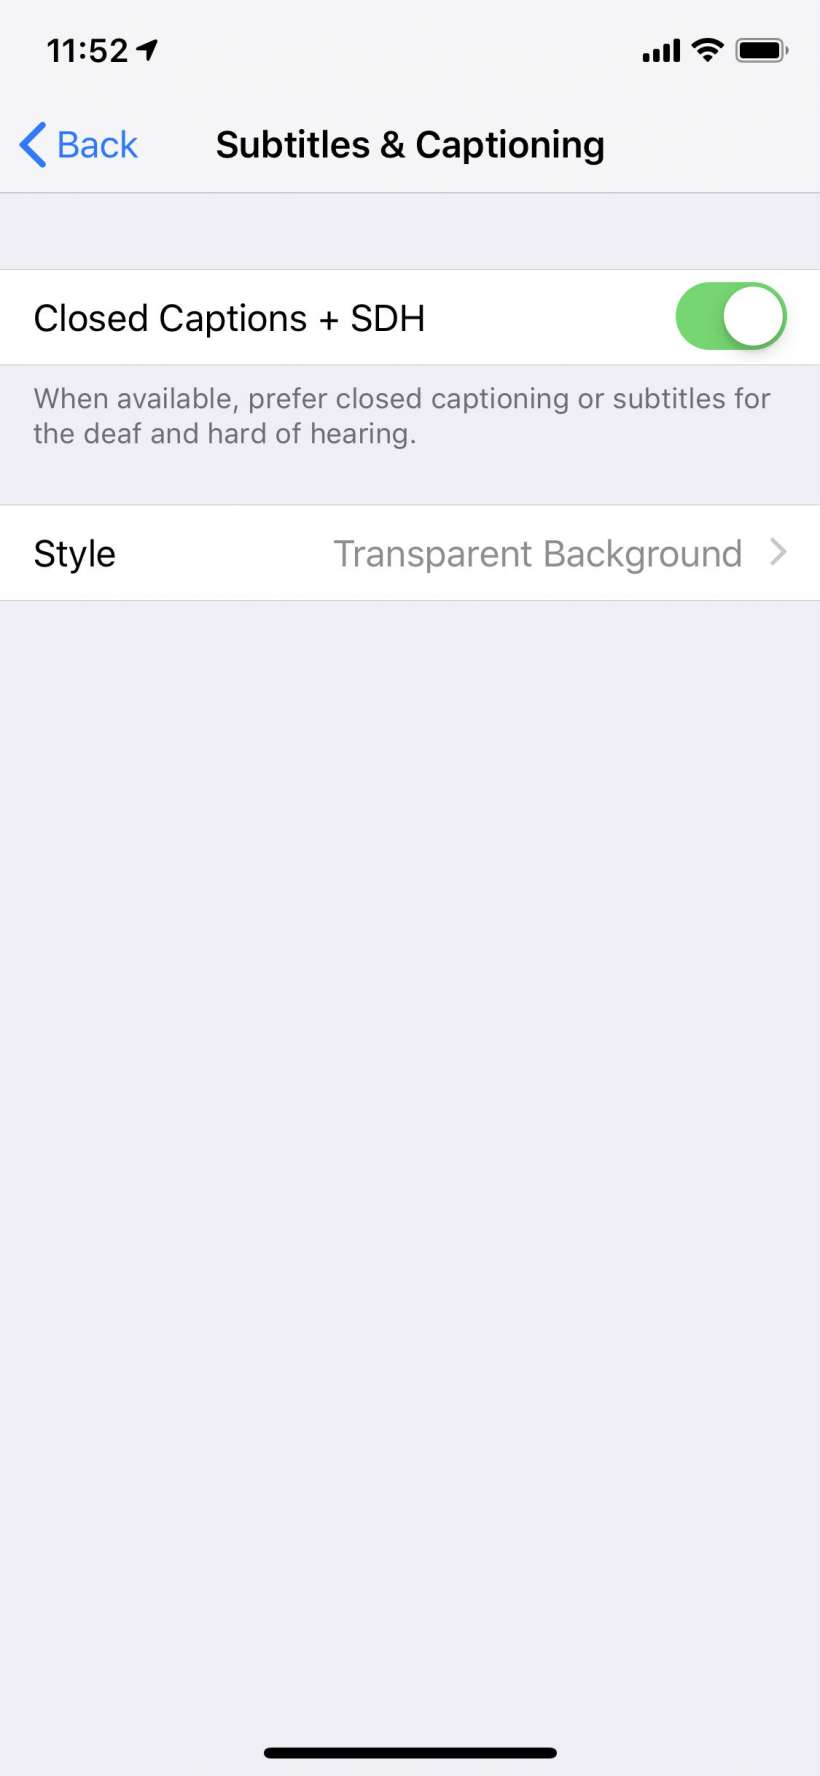
- Toggle on Closed Captions + SDH.
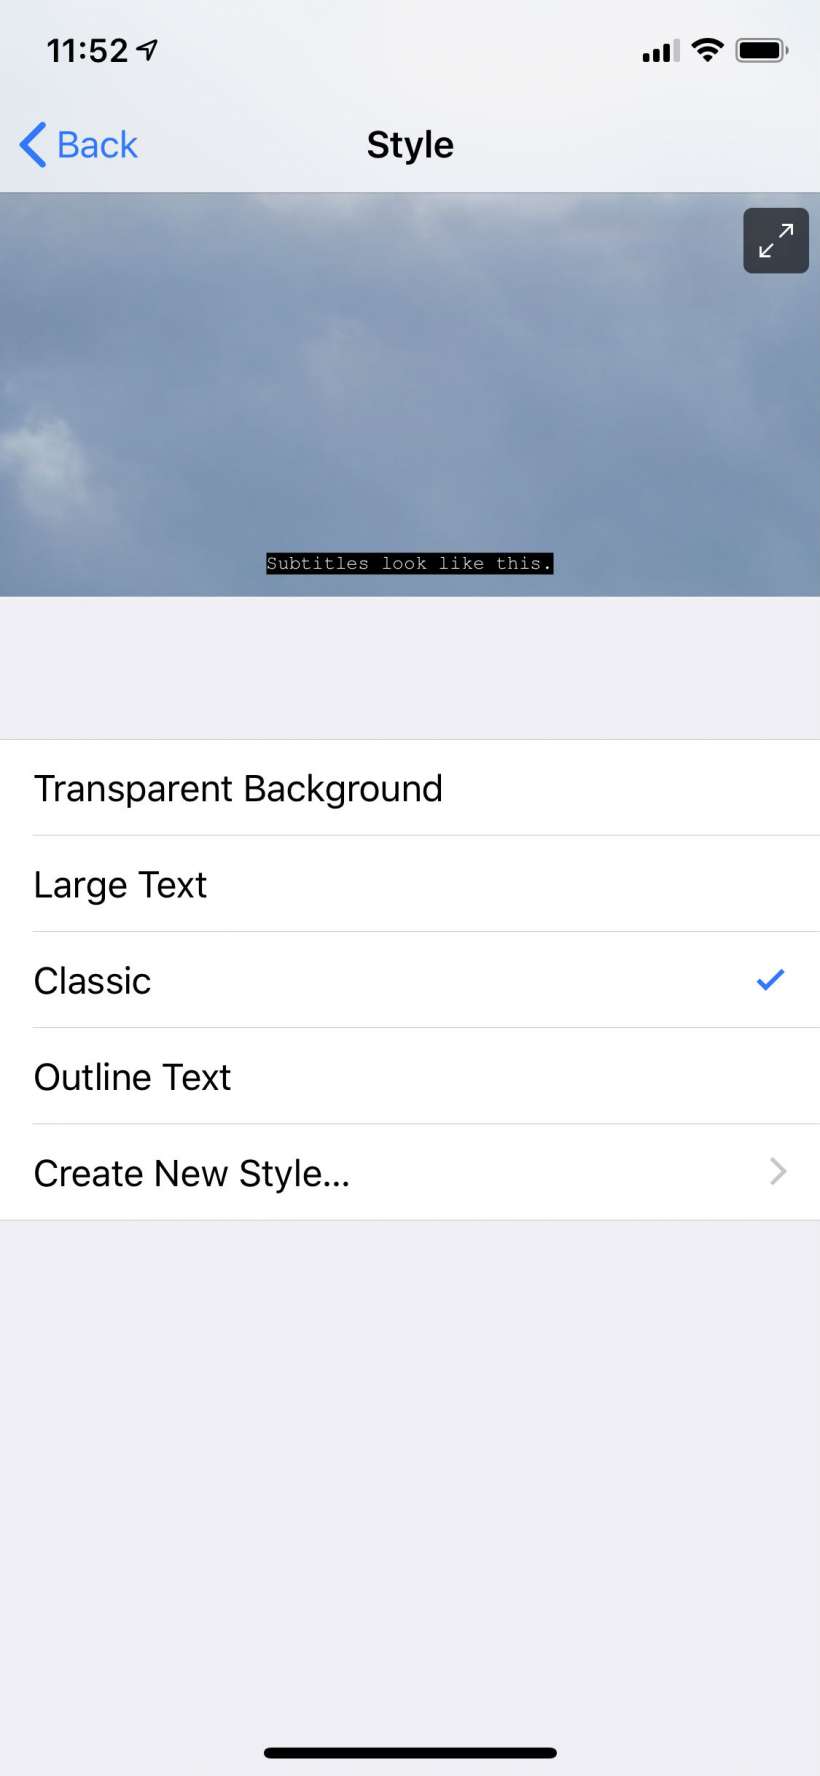
- Tap on Style to select from four default options - Transparent Background, Large Text, Classic or Outline Text. You will see a preview at the top.
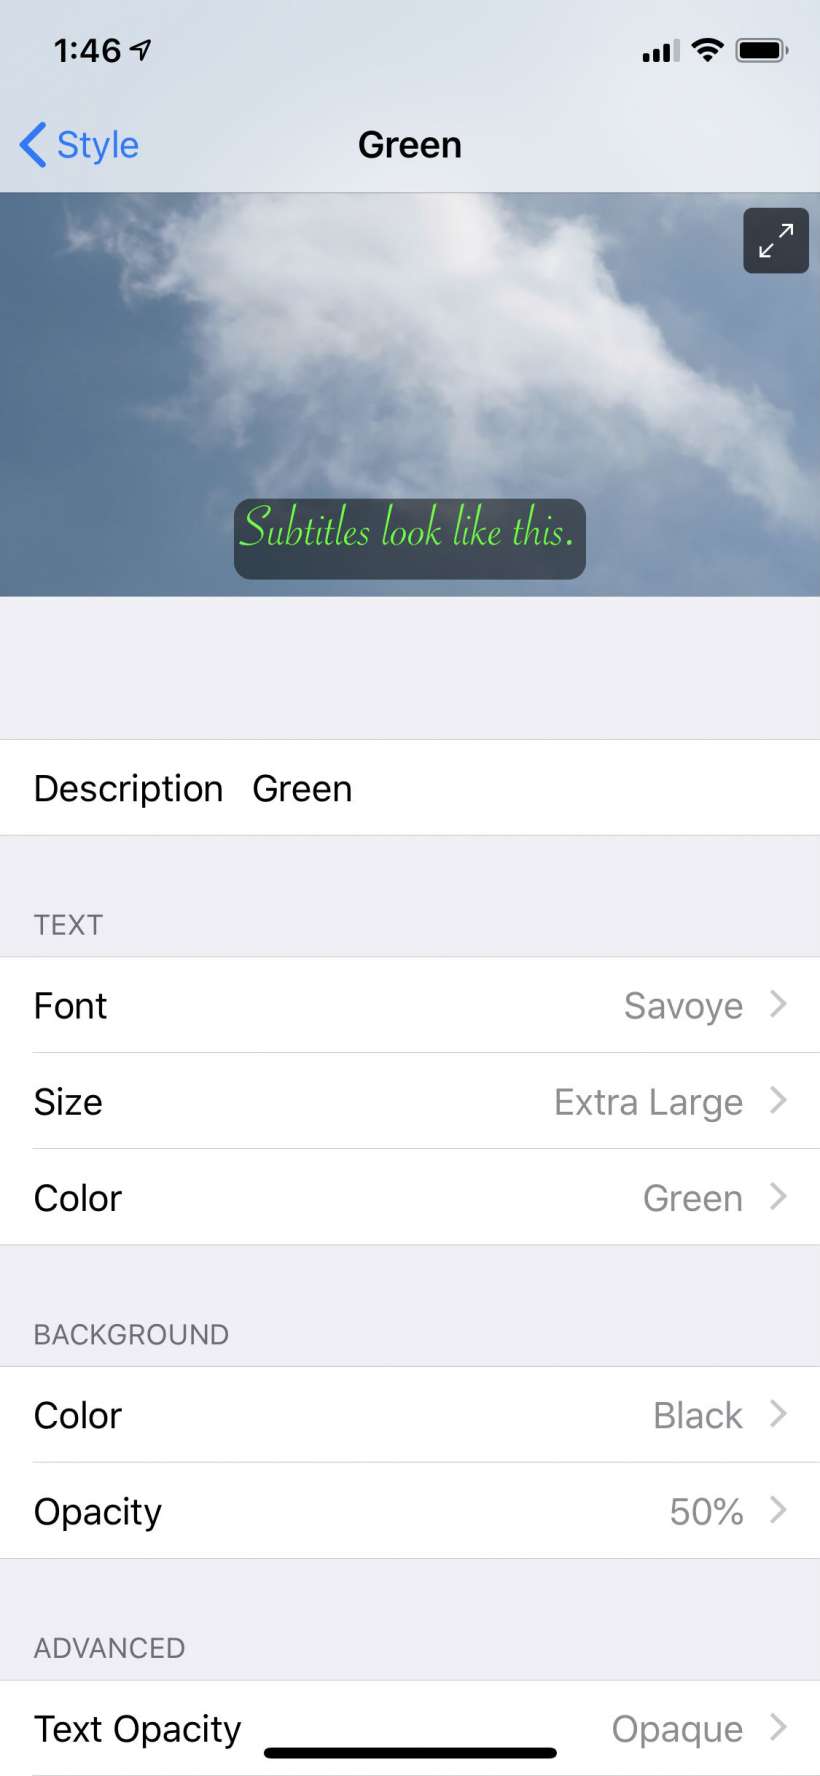
- Tap on Create New Style to customize your own subtitles. Give it a title then choose font, size, color, background color and opacity, text opacity, edge style and highlight.
- Now you should see your selected subtitle style appear the next time you watch something in the TV app. You can see "Classic" subtitles in the screenshot below (Apple doesn't allow screenshot to capture images of protected content, hence the black out). Turn them off with the toggle under Settings -> General -> Accessibility -> Subtitles & Captioning.
