Submitted by Jon Reed on
Apple's Home app is designed to be a control center for all of your HomeKit accessories - TVs, routers, thermostats, speakers, alarm systems, lights, fans and any other appliances or gadgets you might have connected. When setting up your home in the app it's a good idea to organize your accessories by room and your rooms by zone. For example, you could set up a living room and kitchen in a "first floor" zone, then you could turn the lights on or off in both simply by turning on the lights for that zone. Before setting up rooms and zones you need at least one accessory already added. Once you've done that, here's how to proceed:
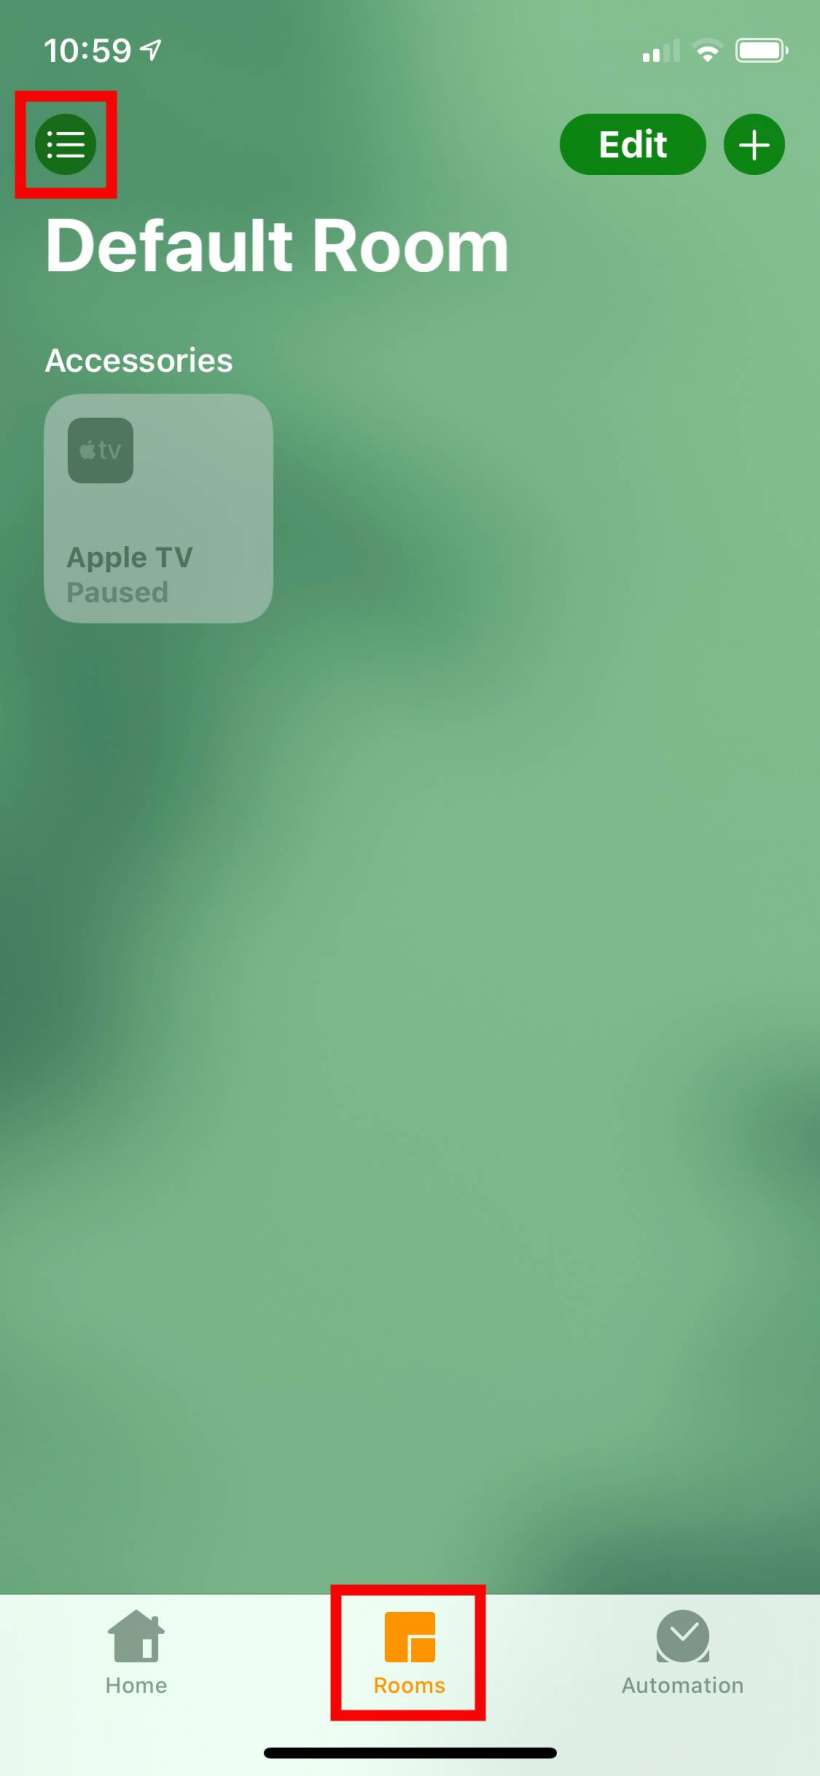
- Open up your Home app on your iPhone or iPad and tap on the Rooms tab at the bottom, tap the menu icon in the top left corner and choose Add Room in the top left.
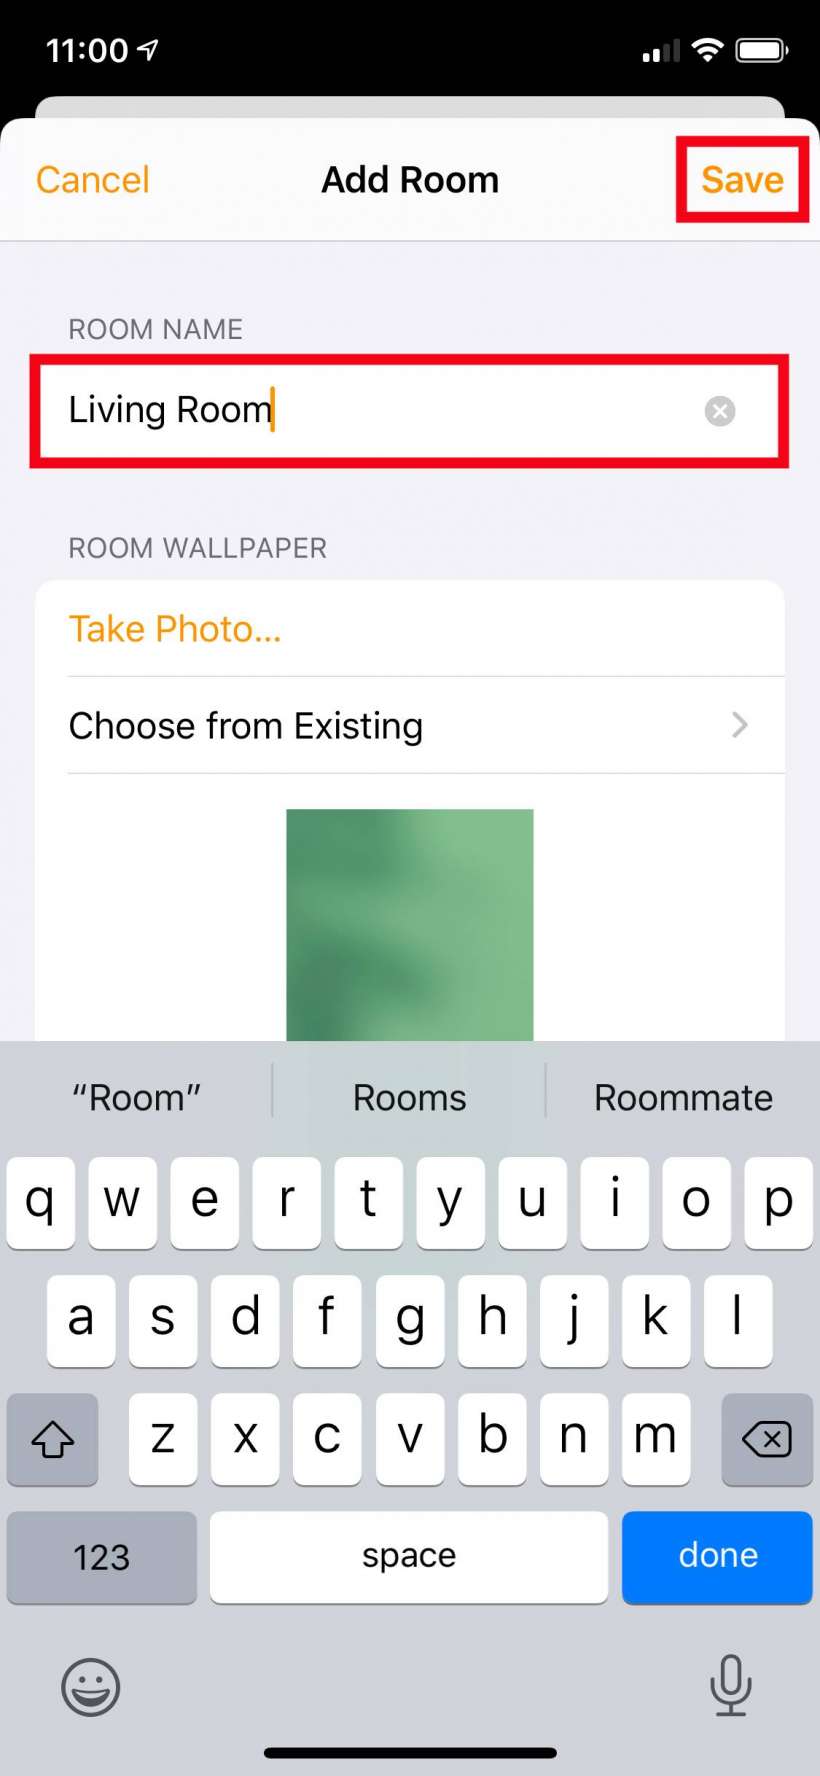
- You will automatically have a "Default Room" with your accessory in it. Once you create a room and move the accessory into it, the default room will disappear. Give your room a name and take a photo of it for a wallpaper, or use one of the app's default wallpapers. Tap Save when you are finished.
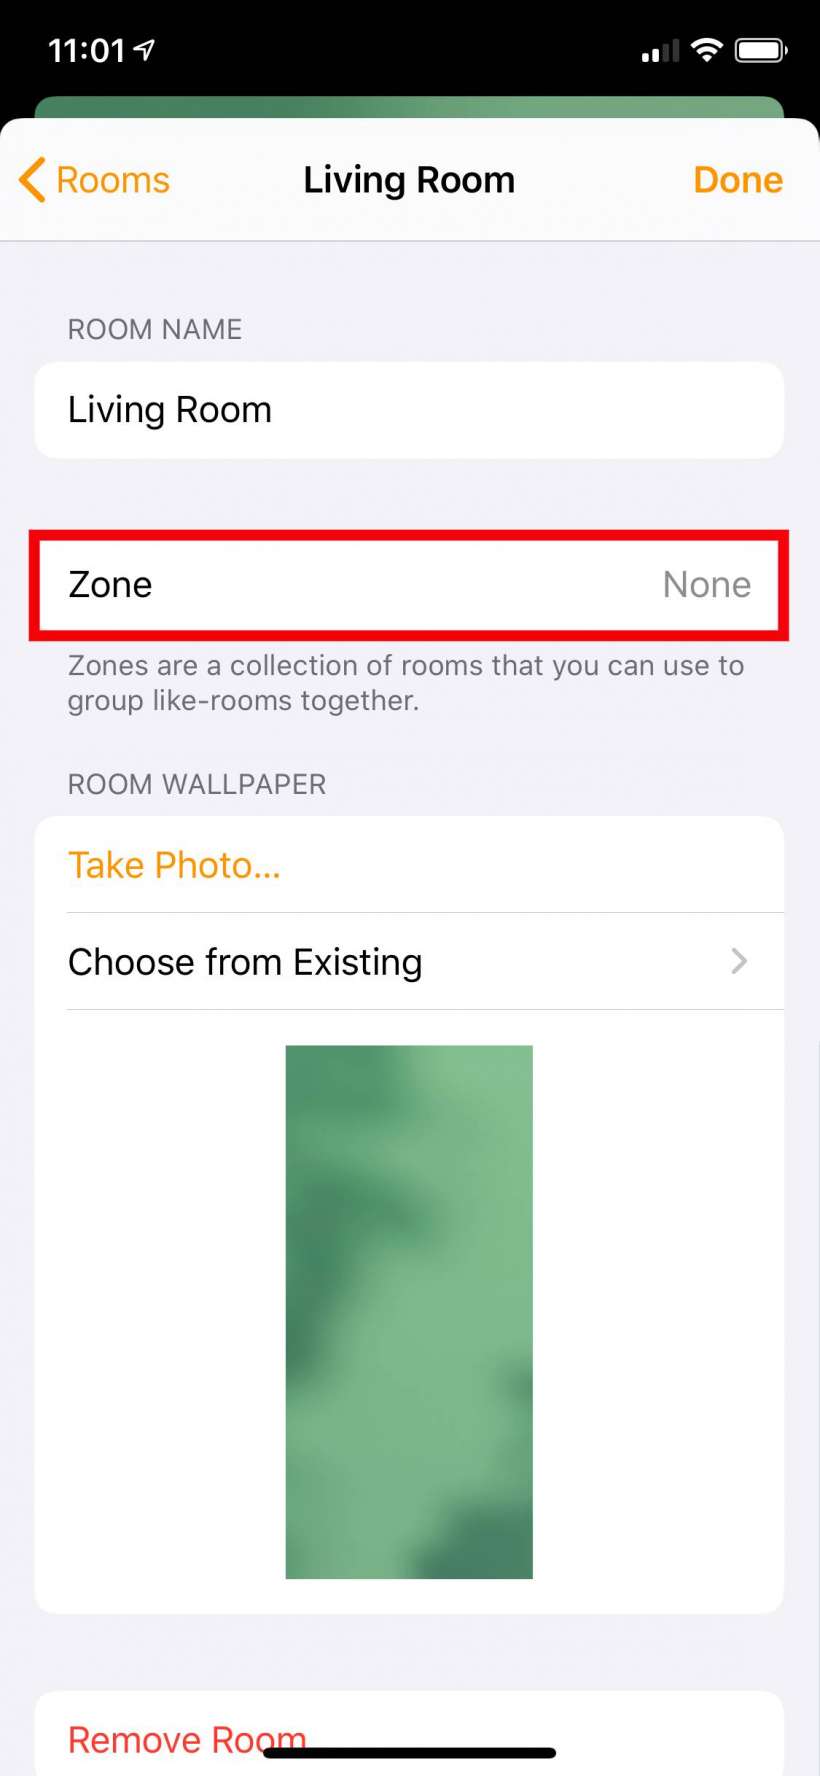
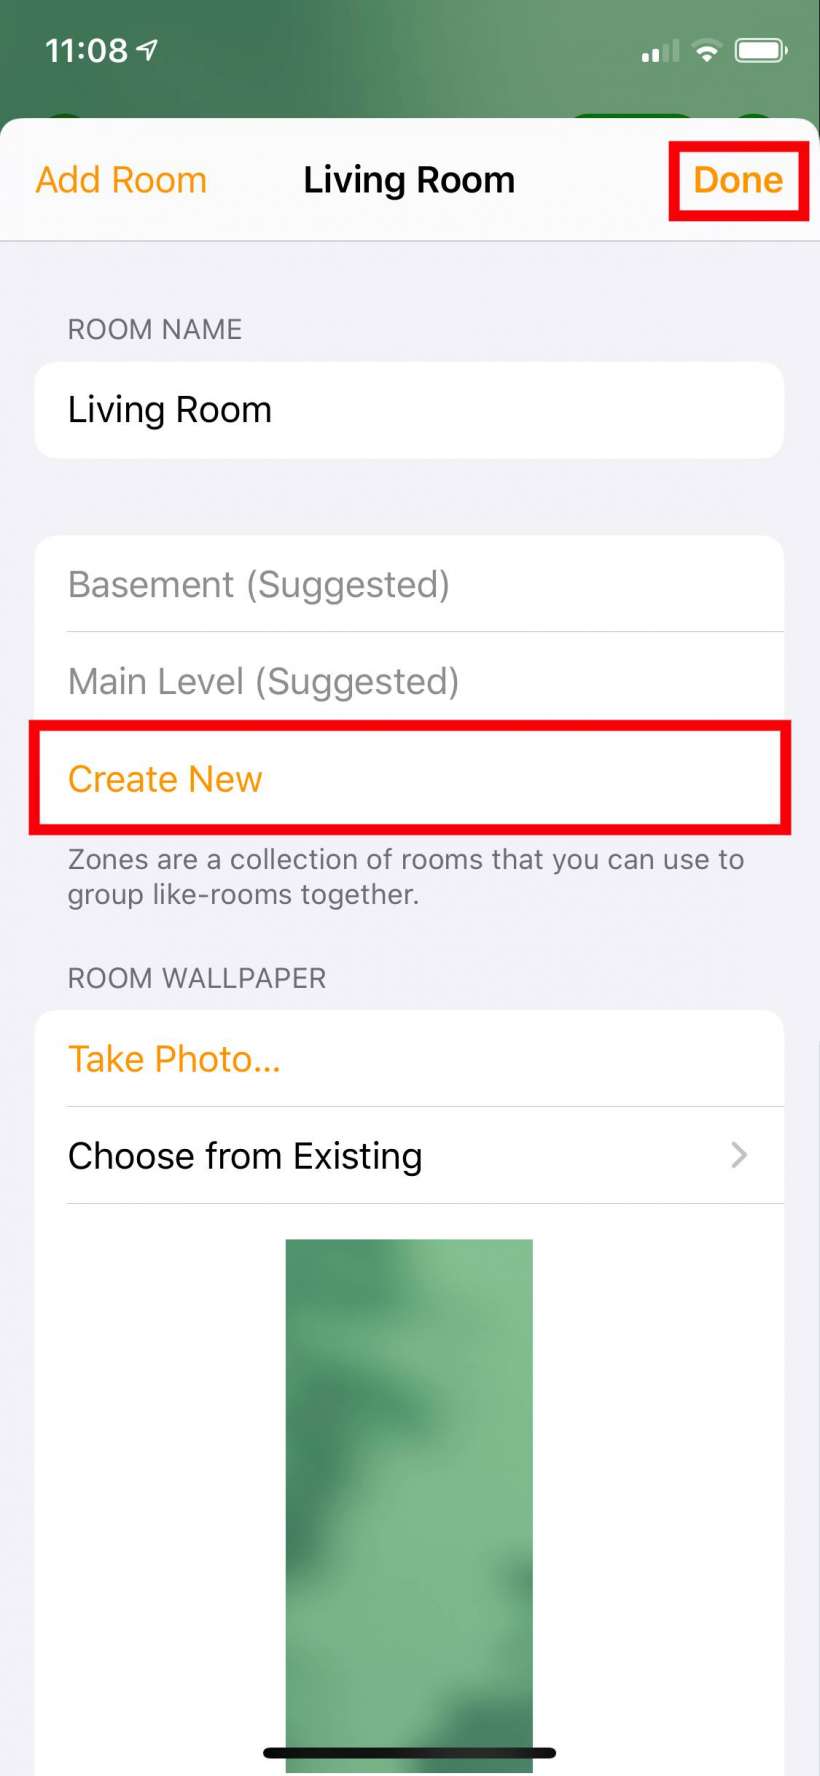
- Tap on Zone.
- The app will suggest a couple names or you can put in your own by tapping "Create New." Tap Done when you are finished.
- Now you have a zone and it will appear as an option for the next room you add.
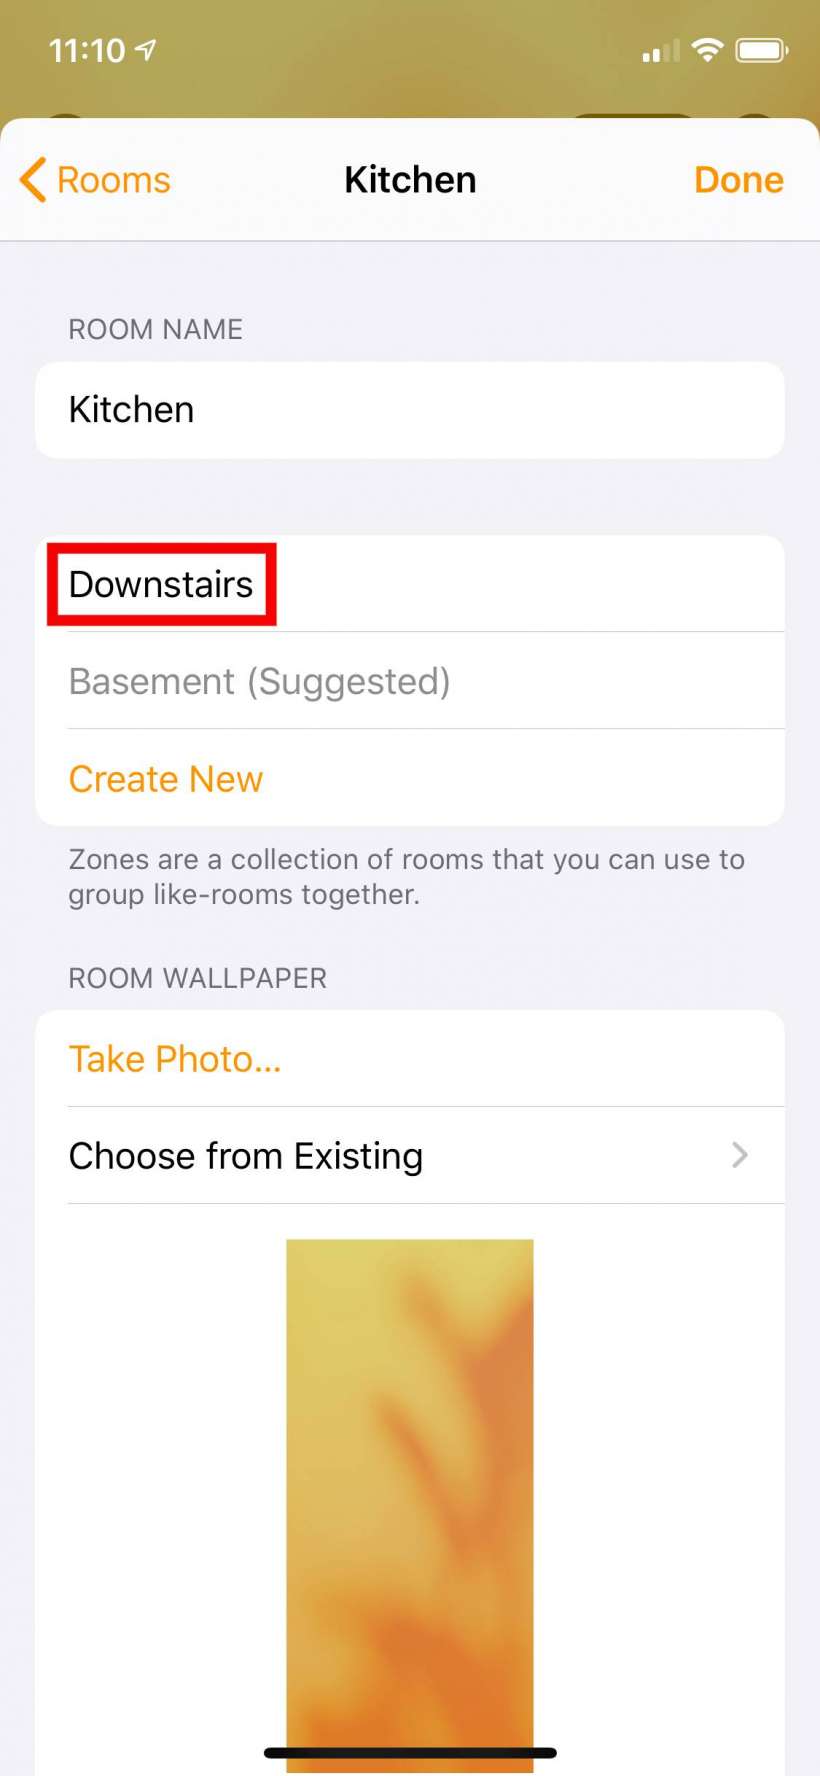
Once you have your rooms and zones created you can place all of your accessories where appropriate. When you add new accessories you will be able to assign them to any of the rooms you have created.
