Submitted by Jon Reed on
The iCloud Photo Library was designed to let you easily sync your photos between all of your devices. If you have it enabled on your iPhone, then you can turn it on on your Mac or iPad and instantly access all the pictures you've taken with your iPhone. Additionally, any photo edits you perform on your Mac will immediately be reflected in those photos on your other devices. Once it is turned on on your iPhone, you will have to set it up in your Photos for Mac app to access your photo library, here's how to do it:
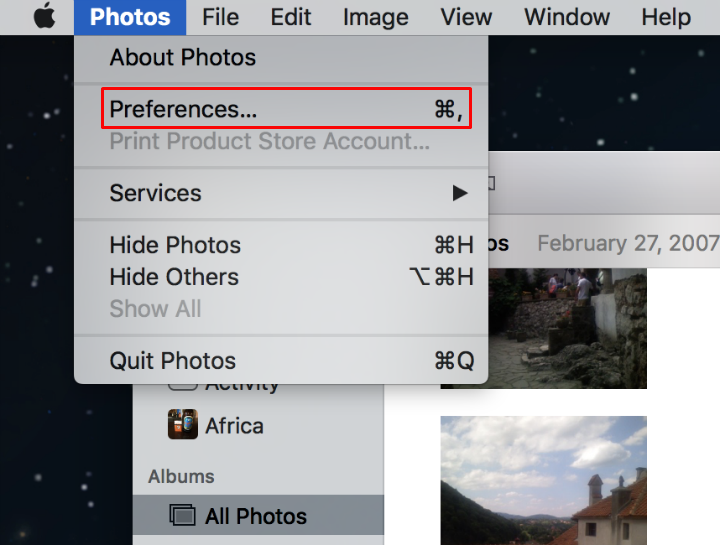
- Launch the Photos app on your Mac.
- Click on "Photos" in the menu bar in the upper left, then click on "Preferences" in the drop-down menu.
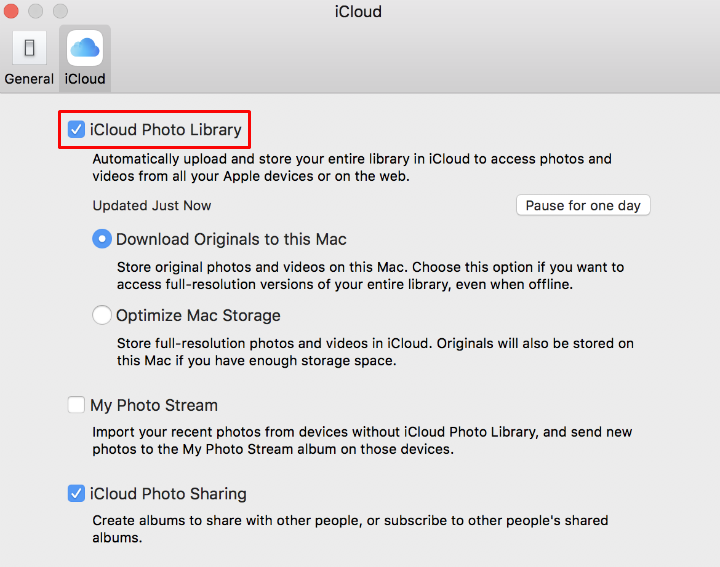
- Click on the iCloud tab in the window that pops up, then check the box next to iCloud Photo Library to activate it.
- Now you can choose whether or not you want to keep full resolution originals on your Mac or just keep smaller optimized versions, while keeping the originals stored on iCloud.
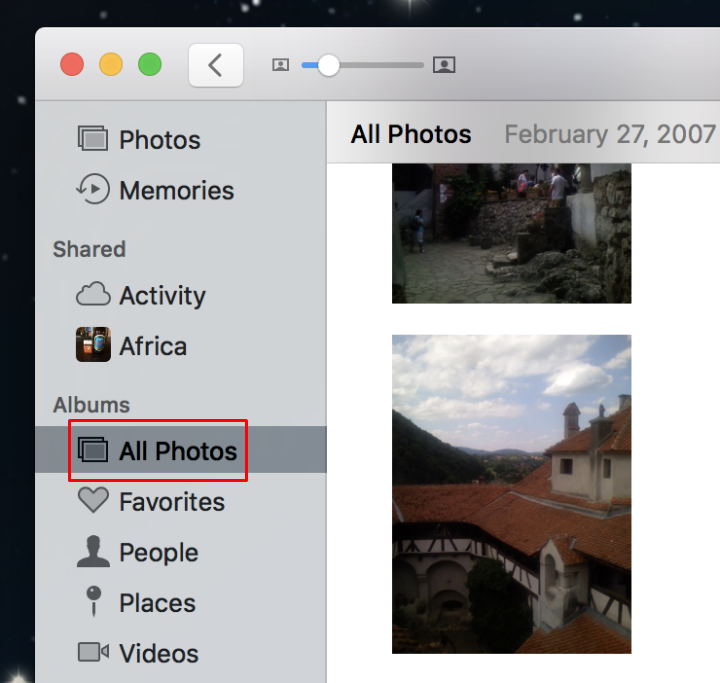
- Once it is on, click on "All Photos" and you will see your full photo library (though it may take a little while to populate).


Another option is to turn on My Photo Stream which is different than iCloud Photo Library. You can also turn on iCloud Photo Sharing here, which lets friends and family see any albums you wish to give them access to.
