Submitted by Jon Reed on
Organizing your photos into albums can be a lengthy, painstaking process, especially if you have thousands upon thousands of photos to sort through. Fortunately, the Photos app for Mac has a tool that can be useful for this task - Smart Albums. Basically this tool lets you automatically group your photos by a number of criteria into albums. Unfortunately, and for unknown reasons, smart albums don't synch with iCloud, so you won't be able to create a smart album on your Mac and then view it on your iPhone. Nevertheless, it is a great feature for sorting your photos, and if need be you could always copy the contents of a smart album into a regular album and thereby have it synch with iCloud. Here's how to create smart albums on your Mac:
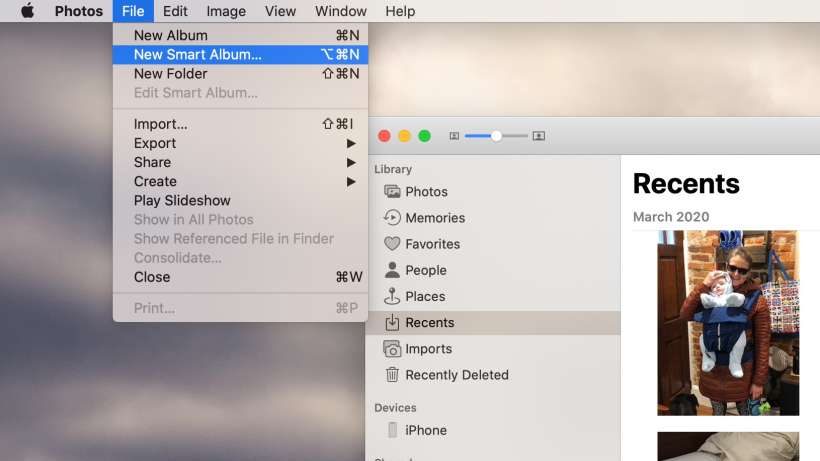
- Open the Photos album on your Mac and select New Smart Album under the File dropdown menu.
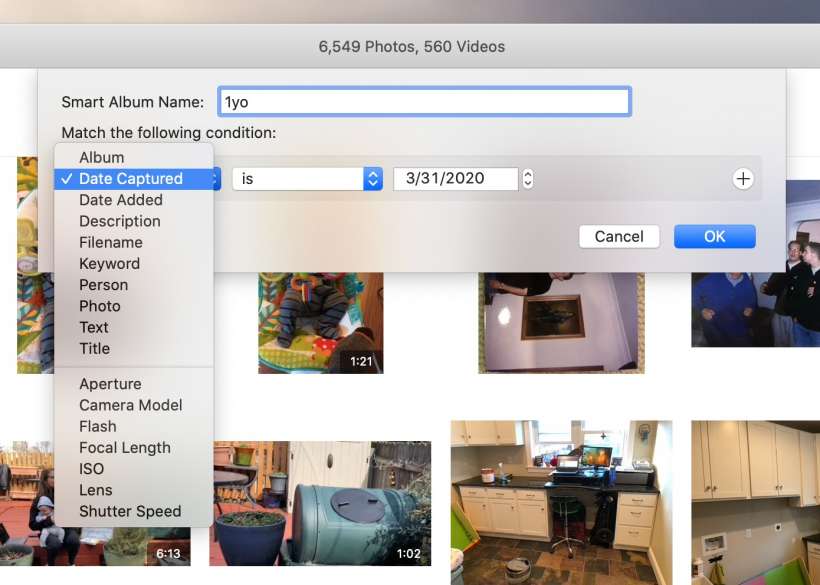
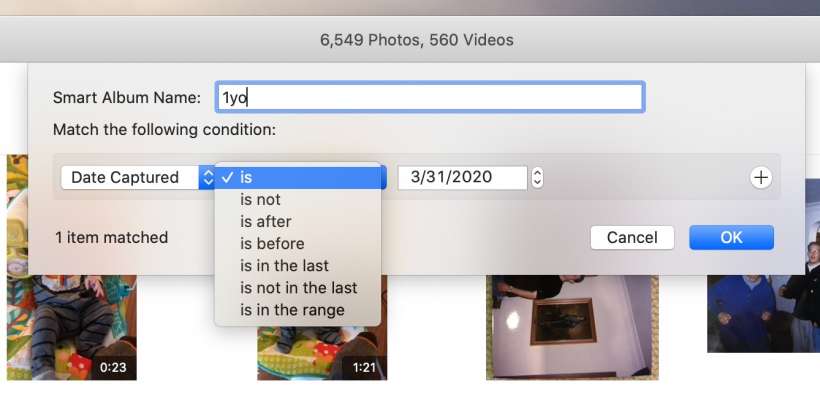
- Now enter a name for your album, then start creating your criteria by clicking on the box on the left (it will say Photo by default). A dropdown menu will open with a lot of choices - Date Captured, Keyword, Person, Photo, Aperture among others. If you have photos mixed in from different cameras you could, for instance, create a smart album that contains all photos taken by a specific camera model. In this example I will make an album containing all videos of my son taken before he was 1 year old, so the first criteria I will enter is Date Captured.
- Now I select a conditional, in this case "is before" will work, but as you can see there are many options. After entering your conditional simply enter a date or date range.
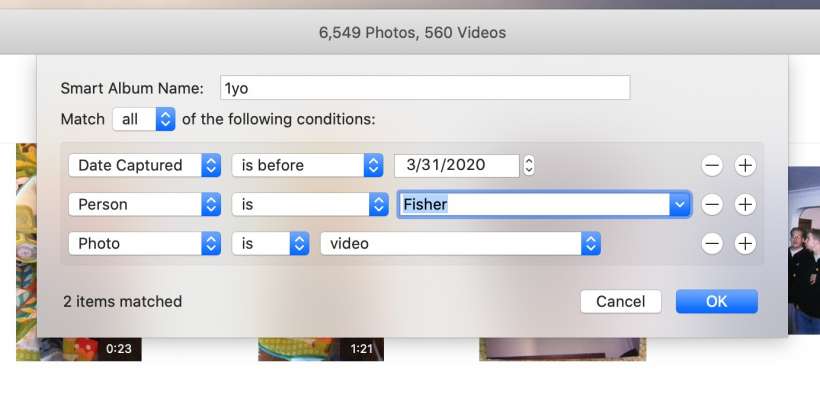
- Click the "+" to the right of the condition to add more criteria (once you have more than one condition a new option will appear at the top asking whether you want any or all conditions to be met). Next I added "Person is Fisher" and "Photo is video." Some of these conditions will only be useful if your photos have been assigned keywords, titles or descriptions.
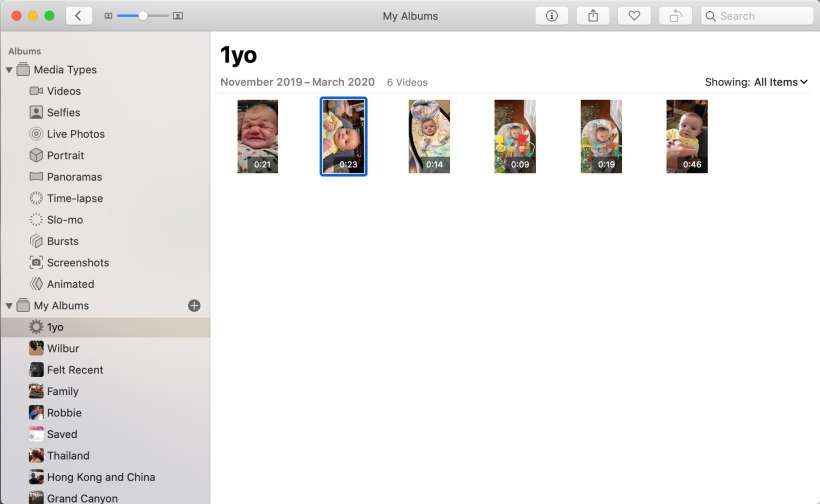
- When you are finished adding your conditions click OK to create the album. You will see it appear under Albums on the left side of the window. If you ever want to add more conditions or drop them, simply right click on the album and click Edit Smart Album.
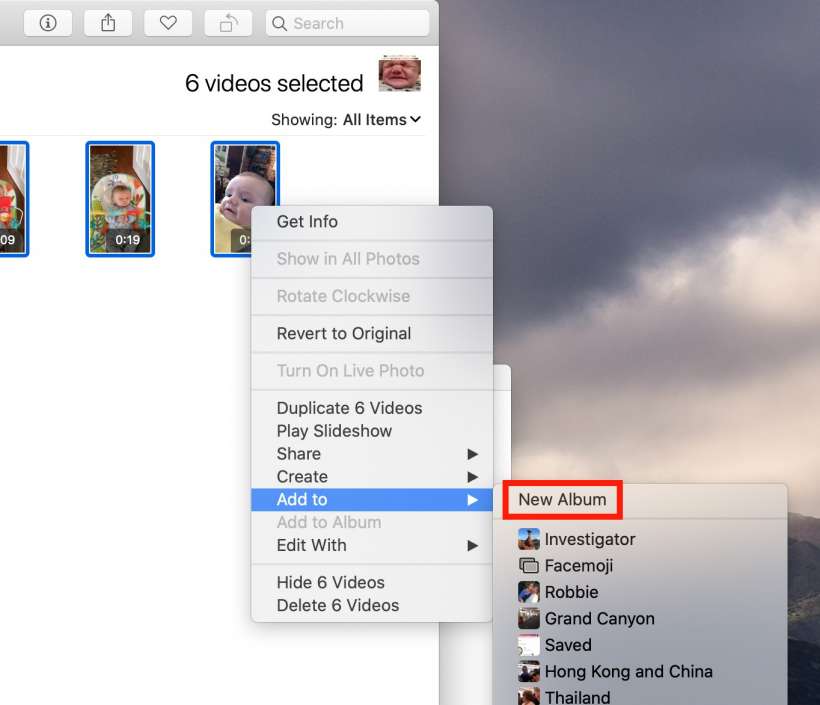
That's all there is to it. As you see, there are tons of criteria and conditions you can set to narrow down to a specific set of photos for your album. One problem however is that you can only set the album to include any or all of the conditions, so for instance you can't make "OR" conditions like the person is so-and-so OR the keyword is such-and-such. If you want to add all of the contents of your smart album to an album that will synch with iCloud (so you'll be able to see it on other devices), simply select all of the photos in it, right click on them and select Add to New Album.
