Accessibility

How to Kid-Proof Your iPhone With Guided Access

The internet abounds with horror stories of kids who have spent hundreds, even thousands of their parents' dollars while playing games on their iOS devices, or have deleted important messages or documents, or have gotten into adult material on the internet, and so on. While there are ways to block mature content and disable in-app purchases, the Guided Access feature found in the Accessibility options gives you even tighter control of your device.

The iOS Accessibility options are primarily intended to assist people with disabilities, but many of the features have turned out to be useful outside of that scope. Guided Access is one of those, and with it you can hand over your iPhone to your child without having to worry about any inadvertent calamities ensuing. It lets you have your iPhone stay in an app for a period of time that you set. You can also fine tune what controls will be available while Guided Access is engaged. Here's how to use it in iOS 8:

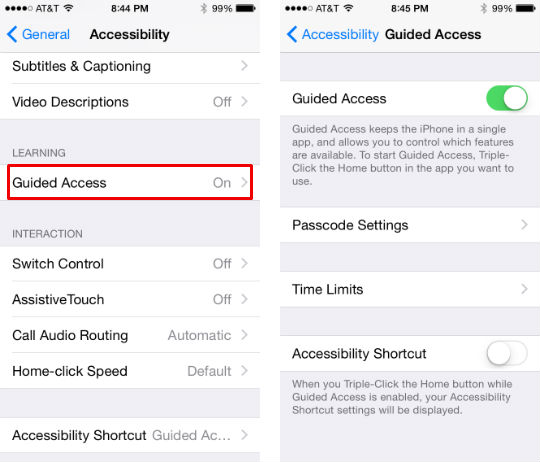
1. Go to Settings -> General -> Accessibility and scroll down to Guided Access. Tap on it.

Use guided access to child-proof your iPhone.

2. Toggle Guided Access on. You can also set a passcode here that will be used to leave Guided Access. If you don't set one here you will be prompted to set

How do I use head gestures in iOS 8?

Apple added head gesture control as an accessibility feature in iOS 7. Your iPhone or iPad's camera can detect your head movement and you can assign a task to it. For example, you can have a left head turn open your Notification Center. To set this up in iOS 8, go to Settings -> General -> Accessibility and scroll all the way down to Switch Control. Tap that and toggle it on. Then tap on Switches to assign actions to left and right head gestures.

Pages

Subscribe to RSS - Accessibility